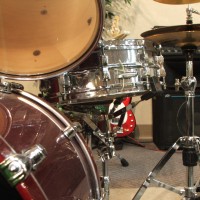

Digital drum loops sound more authentic everyday, but it's hard to replace the soul of a live drummer!
One of the things that I would have liked to get into while I was younger is creating drum loops. Drum loops, whether created live or on a workstation, are essential for musicians in their home recording studios. Often times, songwriters are not in a position to hire a professional studio drummer to play on a track, so they use or build drum loops for their music. I may be late in the game, but I thought I would give drum loops a try in this post. I found some cool information for those of us starting out on drum loops software that should be informative. I hope you enjoy it!
I thought it would be best to find a solid introduction to processing drum loops to start off. The article I found is here at http://audio.tutsplus.com/tutorials/production/how-to-process-loops-using-multiple-tracks/?utm_source=feedburner&utm_medium=feed&utm_campaign=Feed%3A+audiotuts+%28Audiotuts%2B%29.
Using loops in productions is great but sometimes they can become a little static in nature. You can perform cuts, edits and even use automation to spice things up but occasionally I like to spread the loops across multiple tracks to make things more interesting.
Essentially you could complete this technique in any DAW or using any sampler that has multiple outputs. In this instance I am using Logic Pro 9 but using similar effects and routing you should be able to follow in your application of choice.
Step 1 – The Basic Loop
So you could be using a drum loop, an instrument loop or just something you have recorded. As long as it is perfectly looped and in time these techniques will work just fine. I am using a groove based instrumental loop here.
I have looped the groove and left the tempo at the default 120bpm. I have also applied some gentle EQ to brighten things up and passed the whole thing through a limiter to ensure any peaks are ironed out and there are no overs or clipping.
Our groove with some basic processing applied
With all the basics in place we are ready to start on some initial editing and routing. These first few steps are extremely simple, the more complex moves come later!
The basic un-edited loop plays back
Step 2 – Some Initial Editing And Routing
The first thing to do here is to cut the loop up into slices. Now these don’t have to be uniform slices in any way they simply have to be parts of the loop or groove that sound interesting to you. So the key here is to use your eyes and ears to pick out useable exerpts.
I find that it does work well to pick out sections with defined transients and clear dynamic signatures. This will give at least some of your edits real impact. You can see from my screenshot below which bits I went for in my loop. A real mixture of snares, fills and instrumentation. Don’t worry too much about getting this part ‘right’ it really is all about experimentation.
The slicing begins
With your loop cut up into some choice slices you can now start to set up the multiple tracks we’ll use to apply our processing. I decided to create a total of three more audio tracks. One for our instrumental cuts, one for the snare and finally one for the fill.
The edits are moved to new tracks
With the tracks created you can start to populate them with you newly created slices. This will leave the original ‘core’ of the loop on it’s original track. The tracks are then fed through a group channel and the processors that were on the original track (EQ and Limiter) are applied to the group. This will save CPU and also keep things simple.
And the new tracks are routed and mixed
Step 3 – Treating Your First ‘Layer’
We are now ready to apply some processing to our first new track or ‘layer’ of slices. My first track contains slices of the instrumental sections of the loop. I wanted to increase the contrast between these new slices and the rest of the original loop.
To create this contrast I started by applying a simple low cut (or high pass) filter. By removing all of the low frequency these sections immediately stood out and transformed the feel of the loop.
A simple low cut is applied to the first edits
The high pass / low cut filter is applied
To enhance this contrast even further I applied a phaser to this track. This imparted a dynamic feel to the instrumental slices and also added space and depth to the part. Any modulation effect will work well here but I particularly like the intense feedback that can only be achieved with a phaser.
A phaser is then applied
And finally a touch of tape delay
The phaser and tape delay are added
Step 4 – Applying Further Processing To The Remaining Parts
I continued to process the other tracks/layers in the same way, ensuring that I used different effects and processes. It’s all about creating variety and contrast here. The more variation you can introduce the richer the sound scape should be.
The snares were next on my list and these simply got a dose of Logic’s envelope based reverb to make them sound much larger than their dry counterparts. I then moved on to the fill at the end of the loop.
Envelope based reverb is applied to the snare parts
I actually applied two effects to the fill section… Logic’s excellent Ringshifter, which is essentially a ring modulator and the whole thing was finished off with a healthy dose of stereo delay. This made the final section sound very metallic and almost robotic in nature.
The Ringshifter and delay used for the fill section.
The Ringshifter processed fill in isolation
Step 5 – Tweaks And The Final Result
At this point our loop was more or less finished. I was happy with the way it was sounding and felt that my processing had really added something to proceedings. It would certainly stand out more in the mix and now had its own identity.
The automation used to add interest to the Ringshifter effect
You might be wondering how I achieved the sweeping effect on the final fill. This was simply a case of adding a small amount of automation. The main Ringshifter frequency know was swept right throughout the part and this was recorded. Small touches like this can make a big difference here. Now go ahead and mangle some of your own loops using this method!
The final loop is mixed
The final loop in action!
The next video takes a closer look at a four measure drum beat. The video explains how to customize a drum beat to really add some variation. Check it out at http://www.youtube.com/watch?v=pkhsnp0VhPs.
The last video that is involved in the drum loop process steps away from the technical side of drum loop creation and looks at one of the most popular drum samples in the industry. There are song samples that use explicit language, so be warned. Check it out at http://www.youtube.com/watch?v=5SaFTm2bcac.
The last video doesn’t have as much to do with drum loops, instead the video features a MIDI drummer on a keyboard. I thought I would include this for some fun. Check it out at http://www.youtube.com/watch?v=ZO7xuDExo5I&feature=related.
This post was little more involved then other recent posts, but it just goes to show how much information there is to be taught about drum loops and MIDI drums. I hope you found it interesting and educational.
Thanks,
Chris
Leave A Reply (3 comments so far)
Francisco Publio Gonzàlez Huìzar
Hey!
Danka Viel mal! (thankyou very much)
Muchas gracias!
Sùper!
Tom Miller
Thank you Chris! This is what I was looking for! What I appreciate about you is how you present everything in an easy to understand language and format without talking down to us, but meeting us where we’re at and building us up from there. This drum loops session is awesome. Thanks so much. Please keep it coming!
Chris
You got it Tom! Thanks for the kind words, I will certainly keep them coming your way. Talk to you soon.